Kotlin Coroutine Channels: Under the Hood Part 1
The Kotlin coroutine library provides a construct called a Channel which behaves like a BlockingQueue. How do Channels work underneath the hood? That’s what we’ll explore in this blog series. As you create complex use cases, it will involve building producers with Channels. Understanding how Channels work will help you to debug your code. Let’s dive into Channels.
What is a Channel?
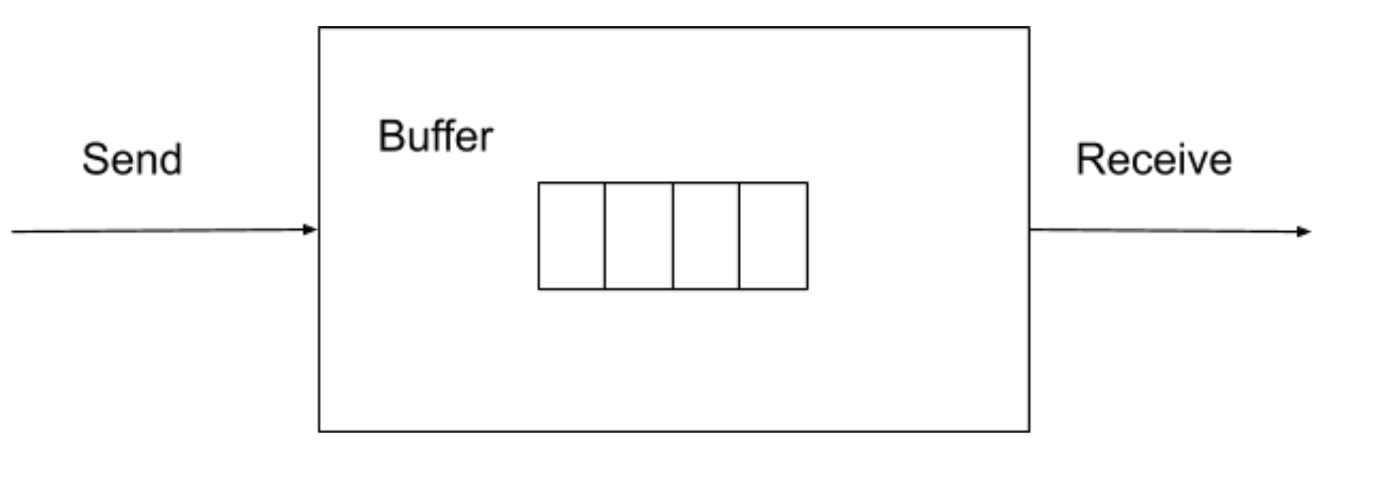
A Channel is a construct that allows you to send and receive values. It has an optional buffer to cache the values.

It is implemented as an interface that has two suspending methods — send and receive. There are five types of Channels
-
Rendezvous Channel
-
Buffered Channel
-
Unbuffered Channel
-
Conflated Channel
-
Broadcast Channel
Each Channel has a distinct property. We will explore the Rendezvous Channel in this blog post as it is the simplest type of Channel.
Rendezvous Channel
A Rendezvous Channel has two properties. It doesn’t have a buffer. If you send a value to it, it will wait until there is a receiver to read the value. Let’s look at this behavior with an example.
runBlocking {

    val channel = Channel<Int>()
    launch {
      channel.send(2)
    }
}
In this example, we have created a Rendezvous channel in the runBlocking coroutine. The child coroutine sends a value of 2. When the send method is called, it will suspend the child coroutine. This is because there is no reciever reading the sent value.
We could observe this behavior by using DebugProbes. It allows us to view the state of all the coroutines in our program.
runBlocking {
    DebugProbes.install()
    val channel = Channel<Int>()
    launch {
       channel.send(2)
    }
    delay(2000)
    DebugProbes.dumpCoroutines()
}

Output:
Coroutine StandaloneCoroutine{Active, state: SUSPENDED}
In this example, we have installed DebugProbes and used the dumpCoroutines method to view the state of the child coroutine. Its state is suspended. When a consumer is ready to read the value, the child coroutine is resumed. The value sent to the channel is not cached in an array buffer. This is the underlying behavior of a Rendezvous channel. Let’s explore this behavior further by inspecting the channel’s state.
Channel State
Every channel has state. The state represents whether the channel is empty, a value was sent or a value was buffered. When you create a channel, it initializes a queue. This queue is a doubly linked list.
abstract class AbstractSendChannel<E> {
    protected val queue = LockFreeLinkedListHead()
    ...
}
class LockFreeLinkedListNode {
    val _next = atomic<Any>(this)
    val _prev = atomic<Any>(this)
    ...
}
The implementation of the queue is based on this paper Lock-Free and Practical Doubly Linked List-Based Deques Using Single-Word Compare-and-Swap. The operations on a Channel are applications of lock free algorithms.
Each node added to this queue represents a state. Here are some of the nodes that can be added to the queue:
-
SendElement
-
SendBuffer
-
Receive
-
Closed
You could query the state of the Channel at any point of your program. The toString method is overridden in the channel and it returns the number of items in the buffer and the current head node in the queue.
class AbstractSendChannel {
   fun toString() = {$queueDebugStateString}$bufferDebugString”
}
Every channel inherits AbstractSendChannel. As you can see, it provides debugging information in its toString method.
runBlocking {
   val channel = Channel<Int>()
   println(channel)
}

Output:
RendezvousChannel{EmptyQueue}
The Channel is currently empty. When I send a value to it, the state will be updated by adding a node of type SendQueued.
runBlocking {
   val channel = Channel<Int>()
   launch {
      channel.send(1)
   }
    delay(2000)
    println(channel)
    val num = channel.receive()
    println(channel)
}

Output:
RendezvousChannel{SendQueued}
RendezvousChannel{EmptyQueue}
After the runBlocking coroutine has read the value, the queue will be updated to be empty again. Querying the Channel is very helpful as you work through examples and learn about Channels.
Being able to query the Channel’s queue and its buffered items is helpful in debugging. We’ll go more in-depth on the lock-free algorithms in the next blog post. If you have any questions, please feel free to comment below.


